 JapanQuest
Before you start
- Have an email address or one of the social sign-in methods shown on screen ready.
- Companies need business and contact details; creators need a display name and location.
Steps
- 1
Choose a sign-in method
Choose Google, Apple, LINE, KakaoTalk, or email and password. For a new email account, set an 8-128 character password and open the verification link sent to your inbox before signing in. Role registration requires a verified email.
- 2
Confirm the display language
Use the language menu to switch among Japanese, English, Korean, and Chinese. You can change it later in Settings.
- 3
Select one role
Choose Company to publish and manage opportunities, or Creator to find and apply to them. This choice sets your account journey.
- 4
Enter required details
Resolve missing or invalid fields before submitting. Use the same phone and address details that you will use for verification.
- 5
Read and accept required documents
Open and review the Terms, Privacy Policy, third-party data provision, cross-border processing, electronic delivery and logs, role rules, and company direct-payment documents before accepting each required item.
- 6
Review your setup tasks
After registration, follow the setup card for profile, phone, document, and social-account tasks that are not yet complete.
You are done when
Your company dashboard or creator home appears and your registration details are saved in Settings.
Checklist
- The correct role is selected
- Names and phone number are accurate
- The preferred language is active
Screen guide
Screens use test data for explanation. Labels may differ by app version and account state.
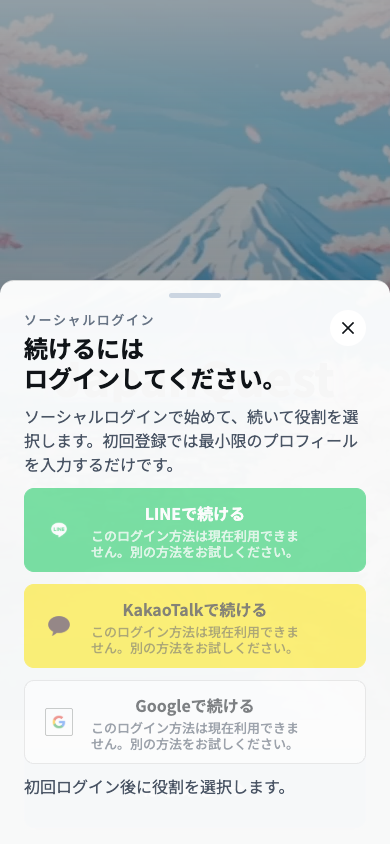
- 1Authentication panelChoose the account used for authentication, then use the same sign-in method on future visits.
- 2Google, Apple, LINE, and KakaoTalkThis figure shows social sign-in. For email sign-in, follow the current screen to verify your email and enter your password.
- 3Pre-use notice and supportIf you cannot continue, note the error and time, then use the support route shown here.
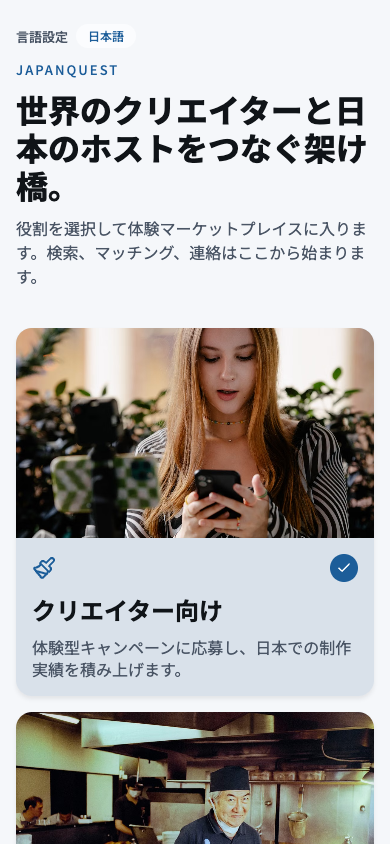
- 1Display languageChoose the interface language before registration. You can change it later in Settings.
- 2Register as creatorChoose Creator to find campaigns, apply, publish content, and submit results.
- 3Register as companyChoose Company to create campaigns and manage applicants, deliverables, and billing.
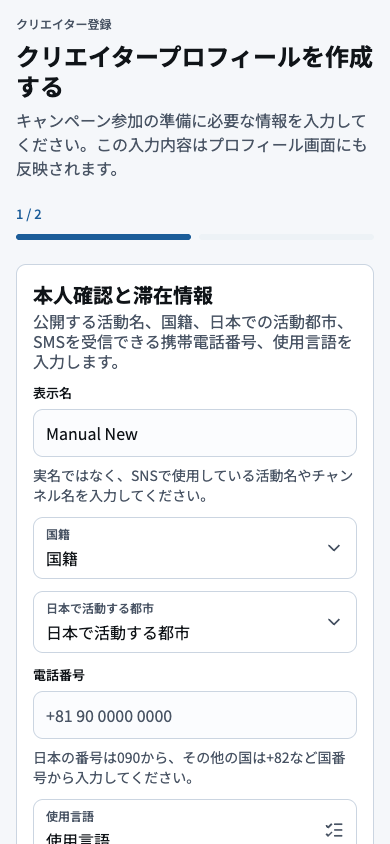
- 1Display and basic detailsEnter the display name and basic details companies will see, checking spelling and consistency.
- 2Nationality and locationSelect nationality and current area of residence; these can affect campaign eligibility and travel.
- 3Contact detailsUse a reachable phone number and email that match the information used for verification.
- 4Language and submitConfirm supported languages and required consents, then submit only when no required field is missing.
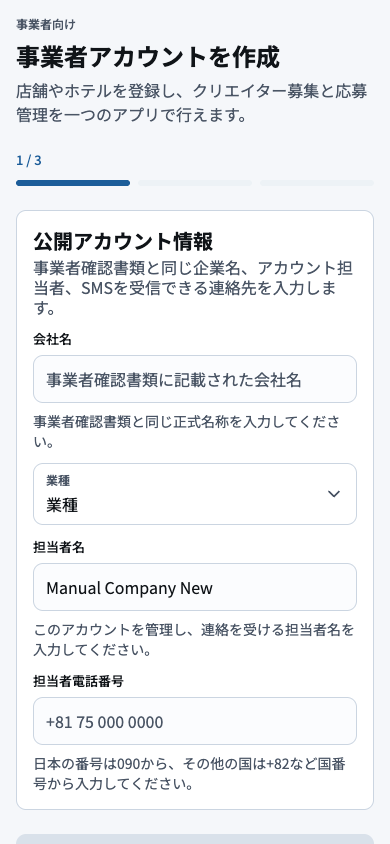
- 1Company and contactEnter the public company name and operator, matching the names used for billing and verification.
- 2LocationEnter the registered or operating address accurately, including building and unit details.
- 3Contact detailsRegister a phone number and email monitored by the operator, and update them when ownership changes.
- 4Business details and submitReview business details and required consents before completing registration.