 JapanQuest
Before you start
- Finish company registration.
- Confirm the legal name, address, contact person, and billing contact.
Steps
- 1
Review the setup card
Check phone verification, business documents, billing plan, and campaign-guide progress on the dashboard.
- 2
Save the company profile
Enter company and legal names, industry, introduction, website, official social profile, regions, and languages. Separate public and internal contact details.
- 3
Add branch information
Add each venue's name, address, nearest station, on-site contact, and visit instructions. Select the correct branch when creating a campaign.
- 4
Use Partner Desk
For multiple campaigns or applicants, use the web Partner Desk to filter lists and edit details with the same company account.
You are done when
Required setup tasks are complete and company and branch details are ready for campaign creation.
Checklist
- No private contact is exposed publicly
- The billing inbox is monitored
- On-site staff know the visit instructions
UI
Screen guide
Screens use test data for explanation. Labels may differ by app version and account state.
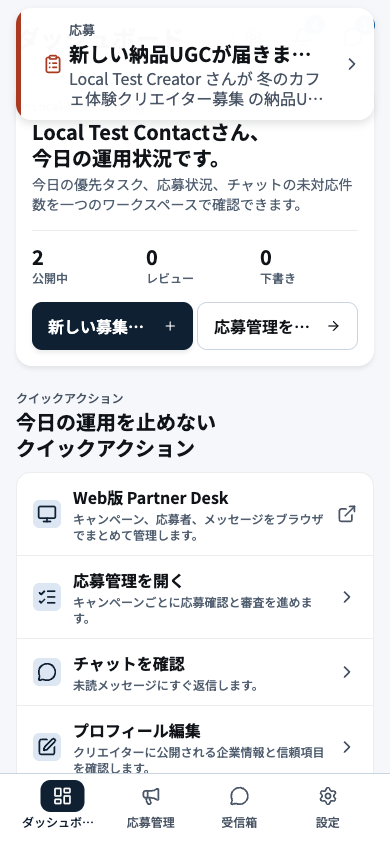
- 1New notificationOpen time-sensitive moderation, message, and applicant notifications first.
- 2Operating summaryReview active campaigns, new applications, and deliverables awaiting company action.
- 3Setup checklistComplete phone, business, and profile requirements that can prevent publication.
- 4Applications and resultsCheck applicant review and deliverable queues for items that have stopped progressing.
- 5Company navigationMove to campaigns, applications, chat, or settings from the company navigation.
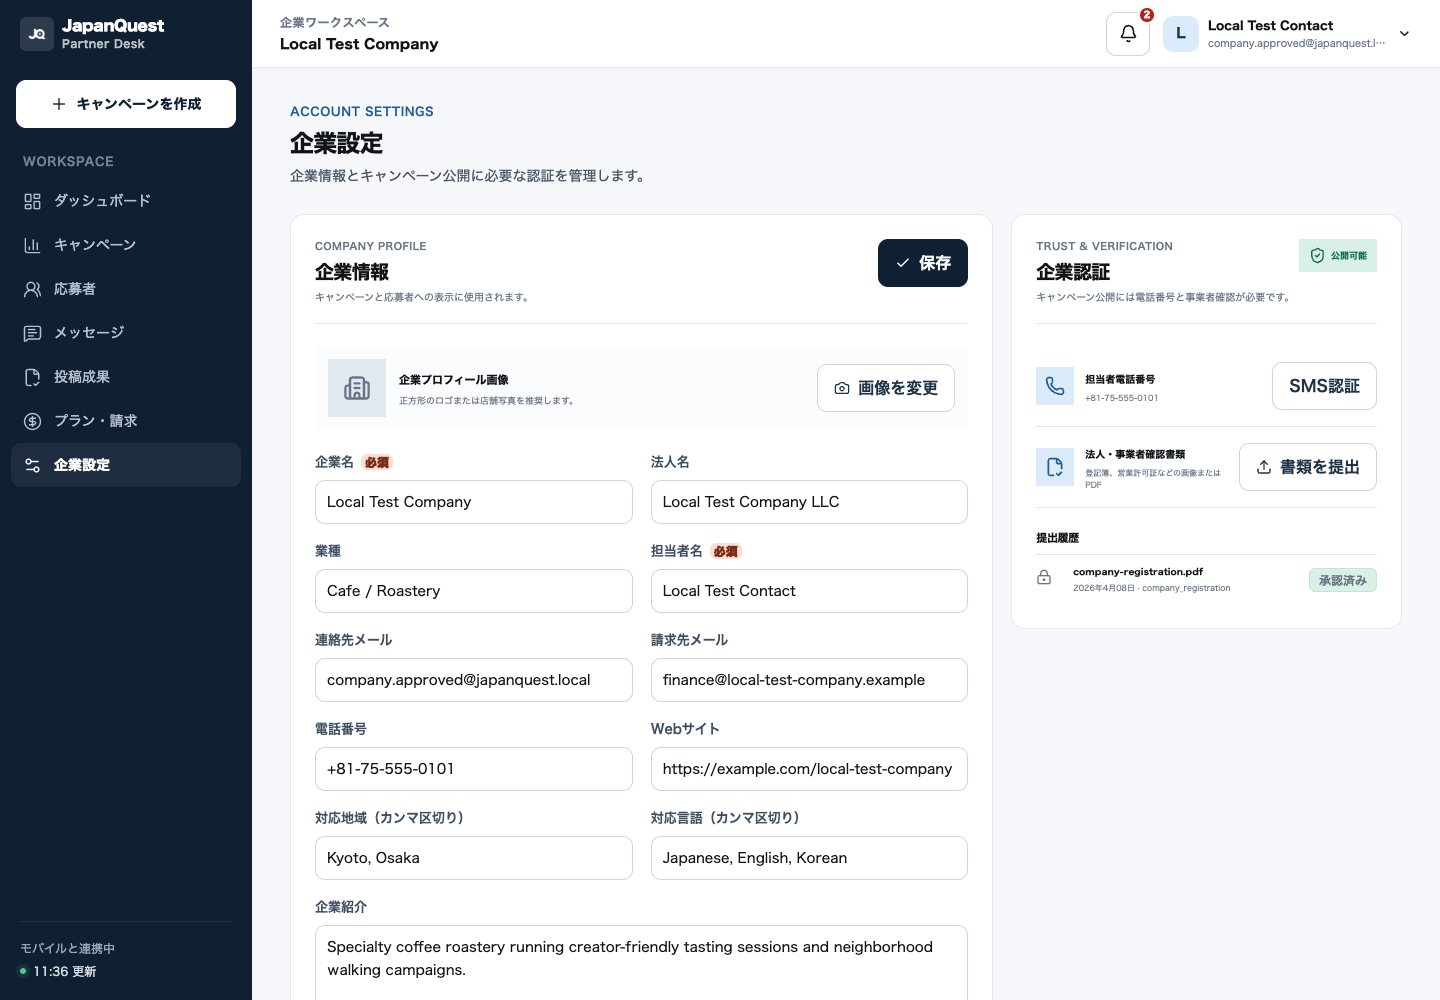
- 1Basic profileKeep the public company name, description, and category accurate and current.
- 2Business verificationCheck legal name, address, and document status; correct only the item named in a resubmission notice.
- 3Branch and contact detailsMaintain active locations and operator contacts, removing closed branches and obsolete details.